Constructing a Tree with Nodes
OrgChartX simplifies the process of creating and organizing nodes in a flexible tree structure. With options for Grid View, Chart View, or Column View, OrgChartX offers intuitive operations across interfaces. Additionally, it provides efficient batch operations for maintaining your organizational charts. This guide covers basic node creation methods and delves into advanced techniques, encouraging you to unlock the full potential of the app.
Basic Operations
OrgChartX provides a variety of basic operations for adding new nodes in list, chart, and column views. These functions are accessible via gestures and menus, ensuring consistent functionality across different devices while leveraging each device’s unique characteristics for efficient and convenient operations.
Mac
On macOS, OrgChartX offers basic gestures, contextual menu operations, and support for application menus and keyboard shortcuts. For optimal operational efficiency, we recommend utilizing keyboard shortcuts.
- Press the "
." key to add a new child to the selected node.- If you do not press the "
Shift" key when adding a new child node, the newly created node will be selected. - If you hold down the "
Shift" key (⇧) while adding a new child node, the selection remains unchanged.
- If you do not press the "
- Press the "
/" key to add a new sibling node after the currently selected node.
Explore OrgChartX using your preferred method!
Now, let’s dive into a video demonstration showcasing the basic operations for creating nodes in a tree on Mac:
iPhone, iPad and VisionPro
On these devices, OrgChartX offers basic gestures and contextual menu operations. To enhance convenience and efficiency, OrgChartX provides an action bar with buttons and menus tailored to the selected node's context.

While the OrgChartX interface remains similar across these devices, it is not identical. However, we've designed OrgChartX to ensure that operations are as consistent as possible.
Now, let's explore a demo video showcasing these basic operations on an iPad:
Continuous Input in Grid View
In the footer of the grid view, you can continuously input nodes to the end of the list. You have the option to insert a space at the beginning of the node name to adjust the hierarchy of the nodes.
- Enter the name and press the "
Return" key to create a new node. You can enter continuously. - The newly created node is on the same outline level as the last node in the list.
- Add a "
space" character at the beginning of the name. The newly created node will be the child of the last node in the list. - Add an "
/" character to the beginning of the node name. The newly added node is at the highest outline level, and its level is independent of the level of the last node in the list. - Click the "
Close" button to stop adding new nodes.
Even if you find that you are already working efficiently with these basic operations, we still recommend that you consider the following options as particularly efficient.
Productivity Tips
OrgChartX offers advanced features to help you use the app efficiently. Please take a look at the following advanced features.
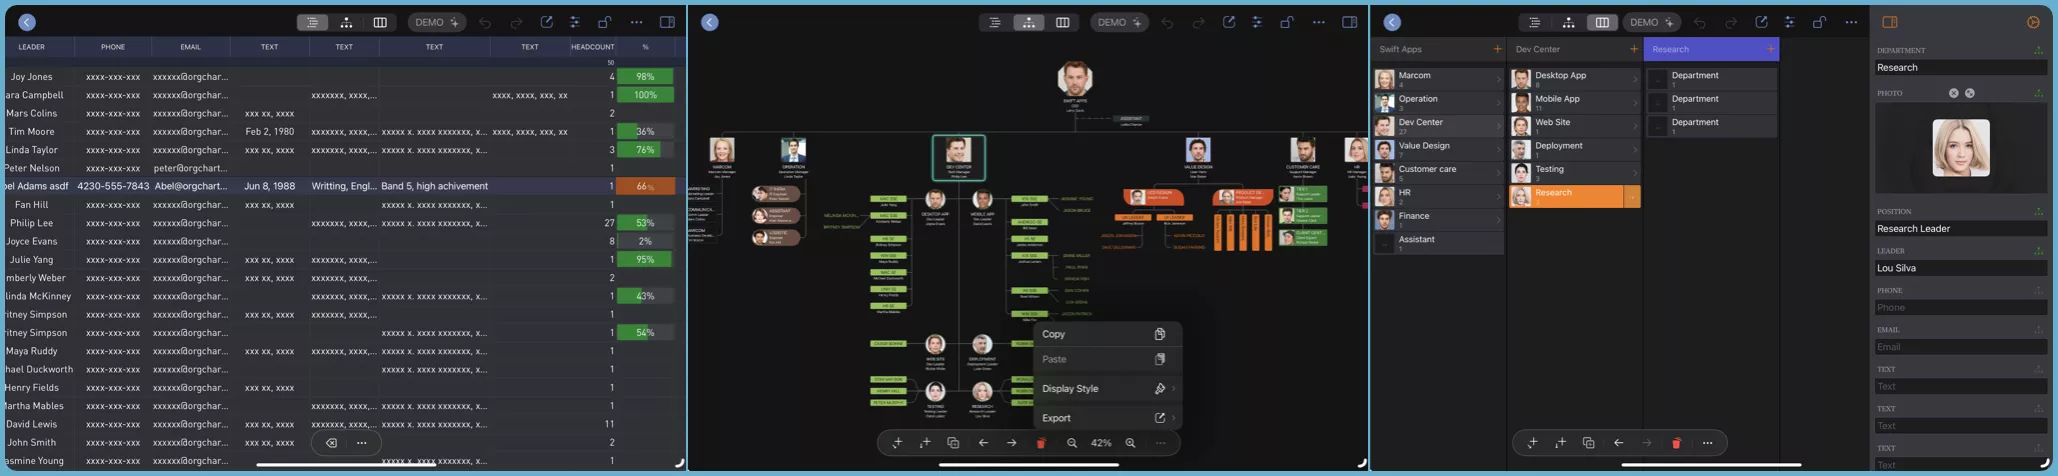
Drag/Drop and Copy/Paste
You can also add new nodes by dragging/dropping and copy/pasting in chart and column views, in the same org-chart window or in multiple org-chart windows, and within the app and with other apps.
- See details on adding nodes by drag/drop.
- See details on adding nodes by copy/paste.
Bulk Inserting
OrgChartX goes a step further and also supports pasting large batches so you can work very efficiently. You can copy and paste to add multiple nodes at once and organize them in a tree structure.
- Multiline text with hierarchical information.
- Multi-row and multi-column cells copied from Excel and Number.
You can be super efficient if you try the bulk insert options. We strongly recommend that you take a look at the details.